NB: We’ve recently rebranded from Citizen to Yaspa, some of the code will still mention Citizen.
Yaspa exposes an REST API to interact with our services. This is the primary mechanism used by merchant users to start payments. We are going to use a free tool called Postman to visually interact with the Yaspa API and start a payment. Download Postman from the following location, you will need to register for a free account:
Get the Yaspa Postman Collection
Complete the following tasks:
- Download the Yaspa Postman Collection from the following location:
- You then need to export the collection.
- Click on the three dots “
” (view more actions), and select Export.
- Select Collection v2.1.
- Open Postman and navigate to My Workspace
- Please click on the Import button and import the Yaspa collection. The import button can be found on the right of the navigation bar:

- Once done you will see a tree structure with the Yaspa API calls:
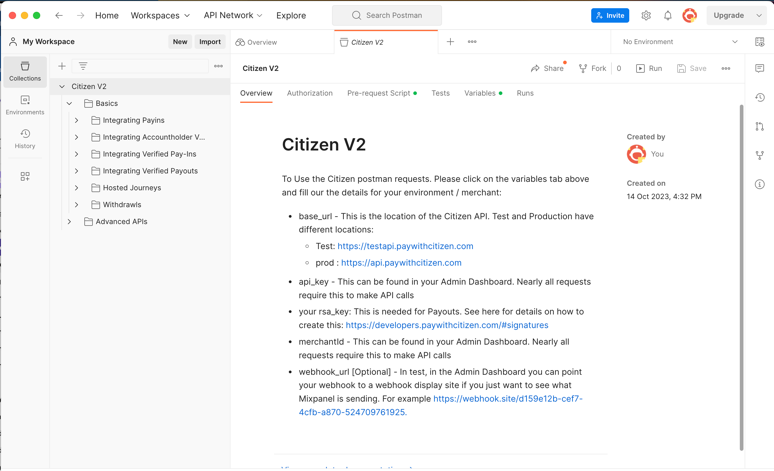
Configuring Postman
- To make a payment with Postman, you need to provide Postman with your test merchant credentials.
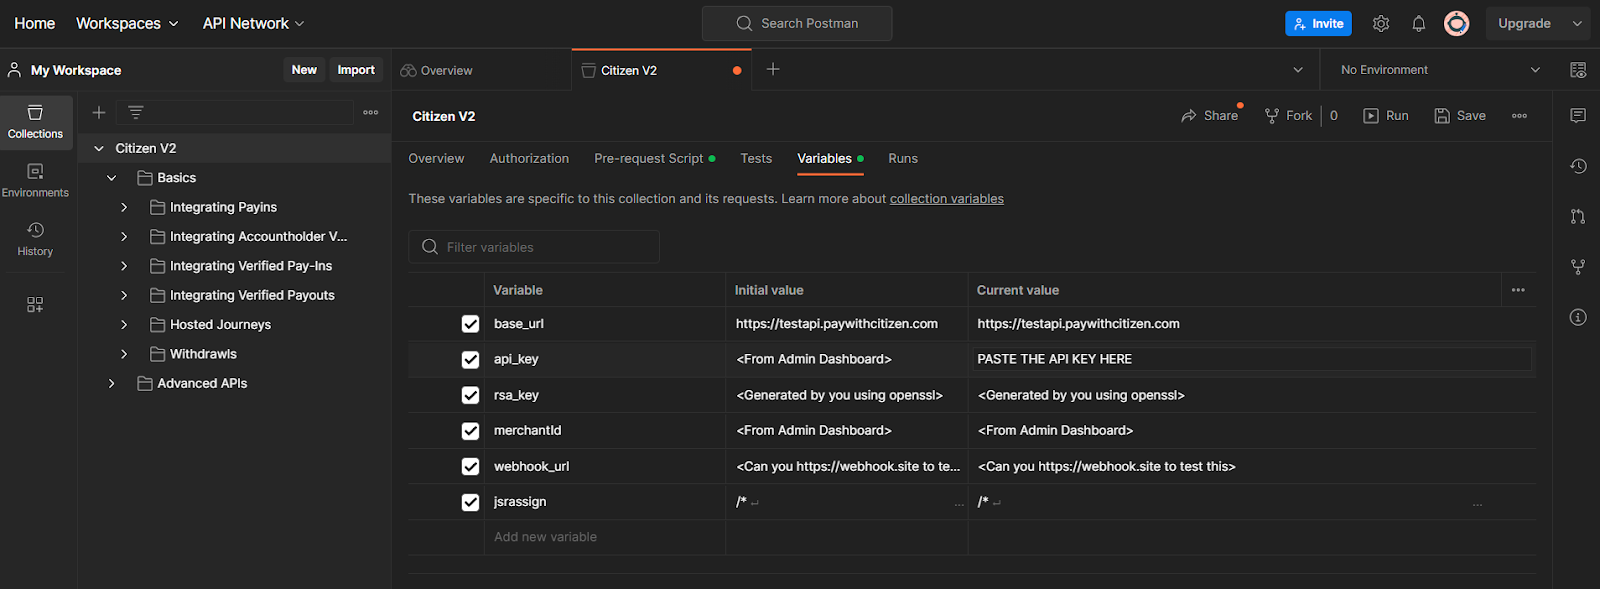
- Within the collection tree, make sure you have Citizen V2 selected and then click the Variables tab on the right.
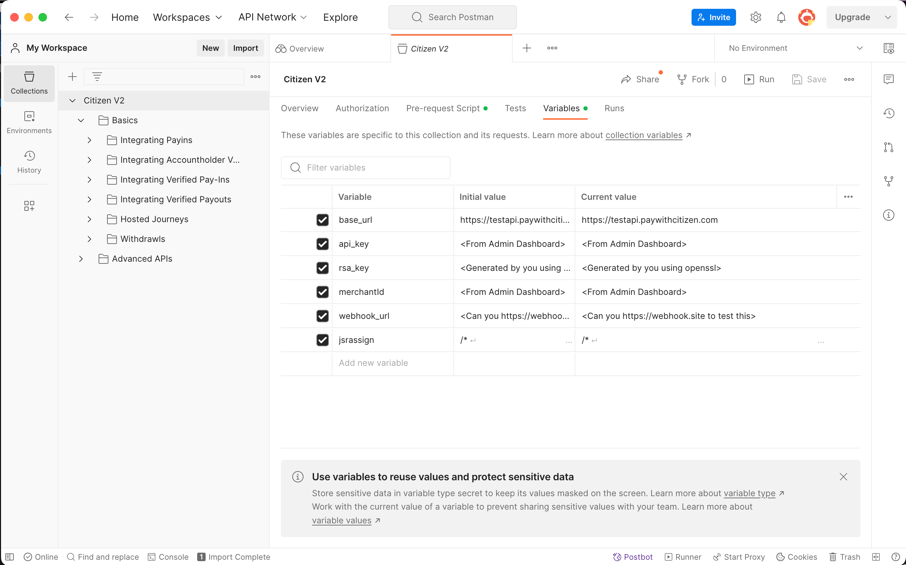

4. Copy this key into the api_key current value cell in the Variables section of Postman:
Related articles
- Understanding Yaspa Integrations
- Taking the Yaspa Integration Questionnaire